 |
| My father when he was a little boy, having a bath outside in a wash tub |
I'm loving the Blue Fern Studios "Timeless" collection so you will probably be seeing a lot more of it in my future posts. For this layout I used the Maconnerie paper.
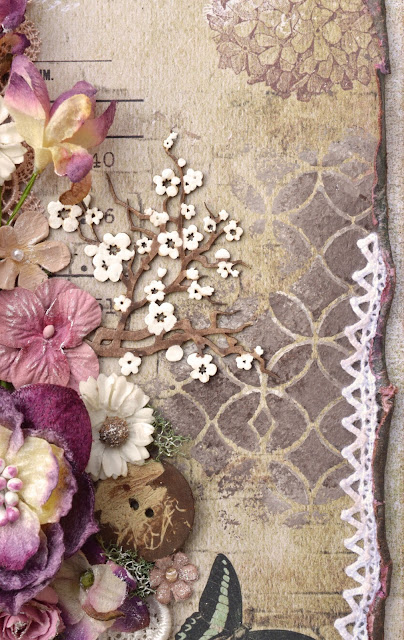
On the background I used a couple of different stencils. With the Lattice Work stencil I used shades of brown paint and with the Dandelion stencil I used molding paste mixed with Pearl Ex powder (Micropearl) and a tiny hint of cream coloured paint.
|
|
I also did some stamping with a Blue Fern Studios stamp and Distress Ink in the Seedless Preserves colour. I also inked around the edges of the paper with this colour. When I later wet the edges of the paper to distress it, the dye-based ink bled quite a bit so the stamped image is a little fuzzy.
These are the chipboard pieces I used:
|
|
 |
| 2Crafty - French Lace border |
For the dandelion "Pretty Weeds" chipboard pieces I painted them, applied Liquid Pearls (white) on the top part to give them dimension and applied Ranger Matte Accents (which they don't make anymore but they do still make Glossy Accents) to the stems to add some dimension there. The center of the large dandelion was made with Sculpey Ultralight and the "Assorted Centers" mold from First Impressions Molds.
I painted the cherry blossom pieces and coated them with the Matte Accents as well.
The French Lace border was painted green then sprayed with Lindy's Stamp Gang Flat Fabio Spray, Sandra Dee Sepia while the paint was still wet.
I mixed several colours of Vintaj Patina Paints to try and get colours I liked for the metal pieces, dabbing them on and also blending them at the same time. I sanded the pieces lightly afterward but the end result was a little duller than I liked so I randomly applied the Seedless Preserves, Distress Ink and then Maroon Color Box Chalk Ink and dried the ink with my heat gun. Tiny brads fit perfectly through the little holes in 2 of the metal filigree pieces so I affixed them to the paper using those. The square/diamond piece did not have a hole in the centre so I clipped the ends off the brad and glued it on top.
The pretty lace around the photo was purchased from an Etsy shop called Ming Ming World.
I tucked little pieces of reindeer moss into the flower clusters.
I didn't use any die-cuts on this one. I hope no one is disappointed, lol.
Thanks so much for taking a look today!


This is such a beauty Tracy! Absolutely LOVE your technique work and how you treated the metal pieces and chippies! Gorgeous work! Hugs, Elizabeth
ReplyDeleteThis is another fabulous and gorgeous creation! All I can do is shake my head in disbelief! Oh my! The purple/plum tones you chose are stunning - absolutely stunning! This is fantastic Tracy!!! I LOVE IT!
ReplyDeleteThat is really wonderful Tracy, love the use of stencils in background and beautiful flowers, what a very big romantic vintage feeling!
ReplyDeleteTracy, this is so beautiful! I love the colors you used. Thank you for giving us all the instructional details. It is so helpful to see how you create your inspiring layouts.
ReplyDeleteAbsolutely exquisite Tracy!! Super charming in every way, a big favorite for me!!
ReplyDeleteAbsolutely beautiful.. love all the pretty details..
ReplyDelete